The thought of creating your own website may seem overwhelming.
You might even think this task is impossible for anyone but a developer or a person with a background in web design.
Well, I have good news for you — there’s a software out there that’s so easy to use, virtually anyone can successfully create a unique and professional-looking website for their business, blog, or portfolio. It’s called WordPress.
But how?
This ultimate guide will cover a basic step-by-step process of creating your own WordPress website as well as a list of tips and tricks to remember while working with WordPress.
But first, let’s answer the question most people have when they begin thinking about their new WordPress website: What is the difference between WordPress.org and WordPress.com?
Wordpress.org vs. WordPress.com
The difference between WordPress.org and WordPress.com has to do with who is actually hosting your website.
You host your own website or blog on WordPress.org, through a third-party hosting provider. You also have to download your WordPress software, buy a domain name on a third-party site, and manage your server. It’s a much more hands-on experience than with WordPress.com.
WordPress.com offers to host your website for you. You also don’t need to download any software or manage a server. If you choose WordPress.com, your website’s URL will look like this: www.mywebsite.wordpress.com. However, you have the option to also upgrade your WordPress.com account and buy a custom domain from a third-party provider (meaning your URL will look like this: www.mywebsite.com).
How to Choose Between WordPress.org or WordPress.com
You may be wondering whether WordPress.org or WordPress.com would be a better fit. Let’s review a few more of the pros and cons that come with both options, so you can make an informed decision.
Wordpress.org is ideal if you want full power over customizing and controlling your website. However, there is a lot more responsibility that comes with managing a WordPress.org website. You have to purchase and set up your own domain name, upload and install plugins and a theme, edit your website’s code, and manage your website’s security. WordPress.org is free to use, but you have to pay for everything else that goes into having a website.
WordPress.com is preferable if you’re looking for an all-in-one option that has most of the hard work done for you. You’ll never need to manage your server, pay for your hosting, or buy a domain. There are also a number of customization options that come with a WordPress.com plan to help you make your website look the way you want it to.
WordPress.com has a free and paid version. If you stick with the free version, you can’t upload any custom themes or plugins, and you will have a WordPress subdomain. However, there is always the option to pay for premium upgrades and other plans that provide you with even more features and control, as well as the option to buy a custom domain through a third-party site.
WordPress for Beginners: How to Use WordPress
There are a number of ways for you to create your dream website with WordPress. Users generally find the software easy to use, but getting started can be understandably intimidating if you’re completely new to the process. That’s why we have built this “WordPress for Beginners” guide. Want a quick introduction before you dive deep? Check out this helpful video:
For even more resources, we've also compiled some of the best websites for learning about WordPress — these can be incredibly valuable sources of information as you start you journey.
Below, we will take a closer look at how to start creating your website.
WordPress is by far the most popular CMS today. Its ease of use and versatility enable the majority of users and business owners to create a website that works for their needs. Here’s how you can do the same.
1. Select a WordPress plan (WordPress.com only).
To begin creating your website, select a WordPress plan. As stated earlier, with WordPress.org you only have one (free) plan option — but it requires you to buy your domain, hosting provider, plugins, themes, and everything else related to your WordPress site.
With WordPress.com, you’ll have to choose between the five plans they offer.
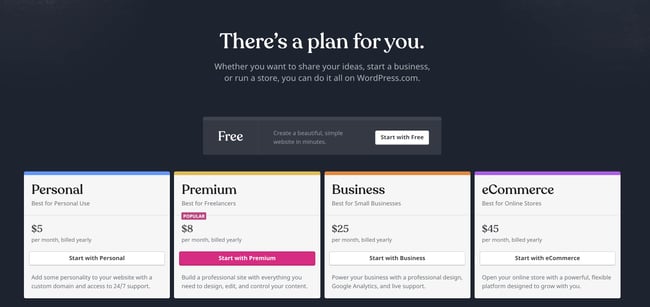
The main differences between these plans are the monthly fee, types of site customization, and the access you get to marketing tools.
2. Set up your domain name and hosting provider.
Setting up your domain name and choosing your hosting provider for WordPress typically happen around the same time in the website creation process.
Before we talk about how to complete those tasks, let’s discuss the difference between your domain name and hosting provider.
Think about your domain name as your home address — it’s how your visitors are able to locate your website on the Internet. You domain name will look something like this: www.example.com.
Your hosting provider is like your house — it's where your website files are actually stored. Without a hosting provider, your site wouldn’t have space on a server to “live.” Some of the best WordPressing hosting providers include WP Engine, Bluehost, and Kinsta.

How to pick domain and hosting providers
Again, WordPress.org requires you to create your own domain and find a third-party hosting provider for your website. WordPress.com allows you to decide whether or not you want a custom domain depending on the plan you choose, but it takes care of the hosting for you.
Your hosting provider is important because it impacts your website’s speed, security, and reliability. There are hundreds of providers to choose from, which is why we put together a list of 22 of the best WordPress hosting providers to help you decide what will work best for you. All of these providers meet WordPress’ three hosting requirements:
- PHP version 7.4 or greater
- MySQL version 5.6 or greater OR MariaDB version 10.1 or greater.
- HTTPS support
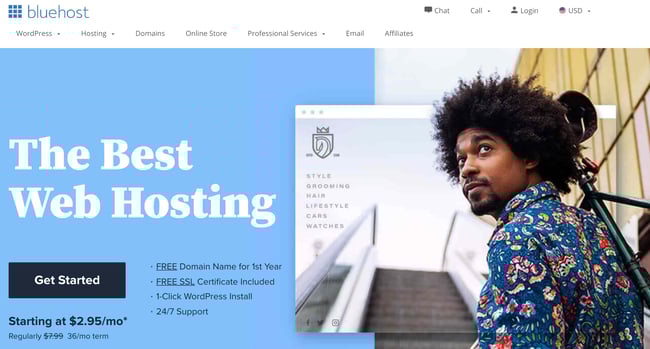
First, head to Bluehost’s website and click Get Started.
From here, you’ll be taken to Bluehost’s pricing page to choose from four plans.
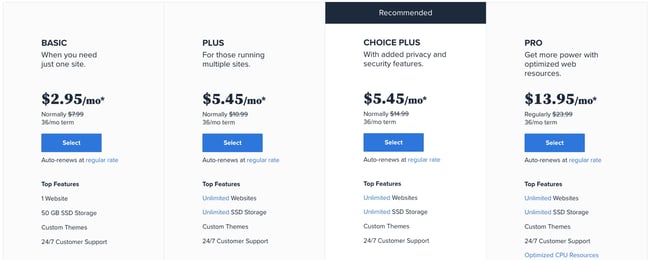
Once you choose your plan and click Select, you’ll be taken to another page to sign up with a domain name.
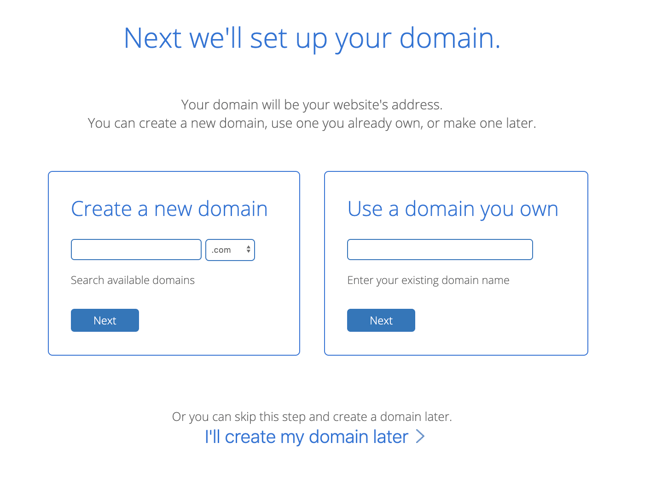
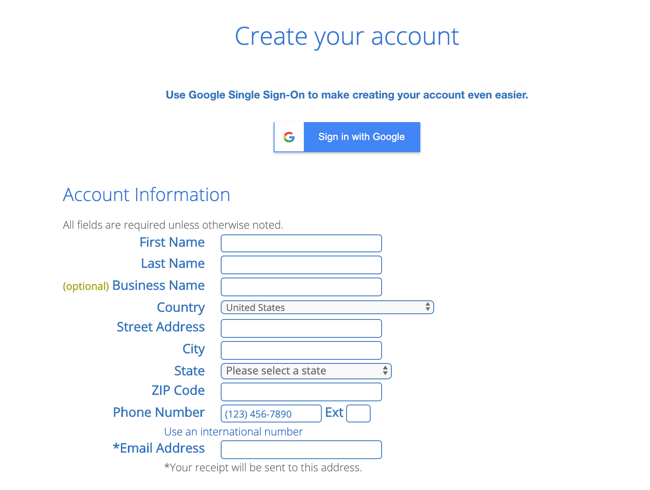
Once you select your domain name, you’ll be brought to a page to complete your account and billing information for your purchase.
After confirming your account and purchasing your domain, you will gain access to your hosting dashboard where you’ll be able to install the WordPress CMS.
3. Install WordPress.
If you are using a hosting provider outside of WordPress, you’ll need to install the CMS to connect your new domain to your website.
This time, let’s use GoDaddy as an example. (Don’t worry, no matter the hosting provider you choose, this process looks similar.)
Note: If you choose to use a managed WordPress hosting service like WP Engine or Kinsta, you won't need to go through this process, as those services were built specifically for WordPress and will have WordPress installed for you.
To start, log into your GoDaddy account, click Web Hosting, and then Manage. You will be brought to a screen with your account details.
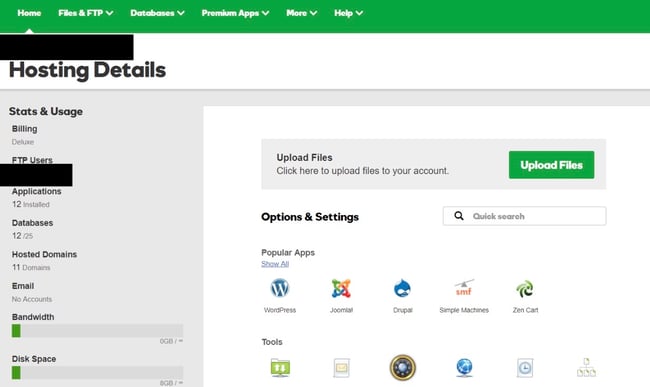
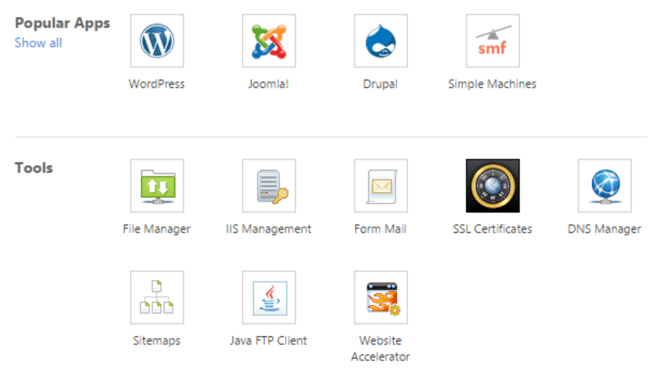
Scroll down and under Options & Settings, you will see an area titled Popular Apps. Click on the WordPress app to begin the installation.
After installing WordPress, you'll need to answer a few questions about the domain you want to use, the directory where you want to install WordPress, and your admin information.
After about 24 hours, your website will be installed to your hosting account, and GoDaddy will send you an email confirmation.
Now that you have your domain set up and WordPress installed, you'll next need to set up your “Primary Domain” within WordPress, so your visitors see your website when they search your domain.
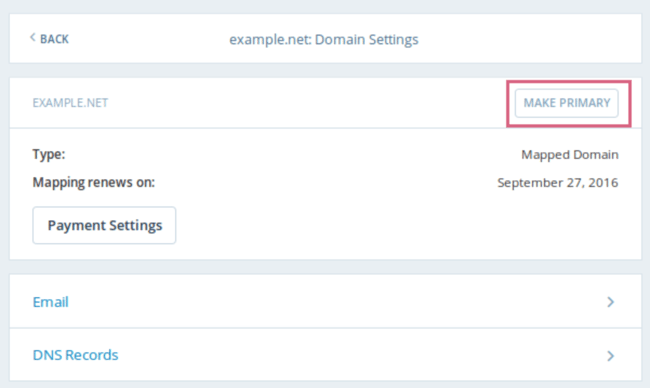
In WordPress, go to My Site and click Domains. Select the custom domain you want to make your primary domain.
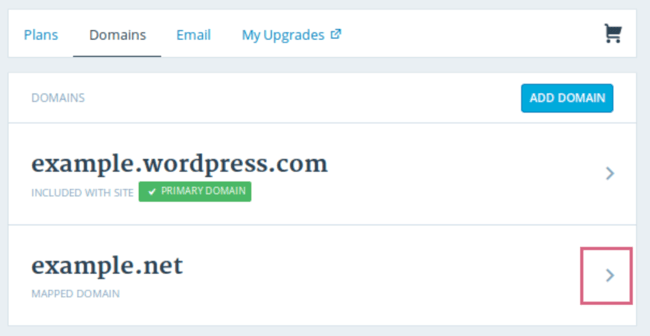
Then, click Make Primary.
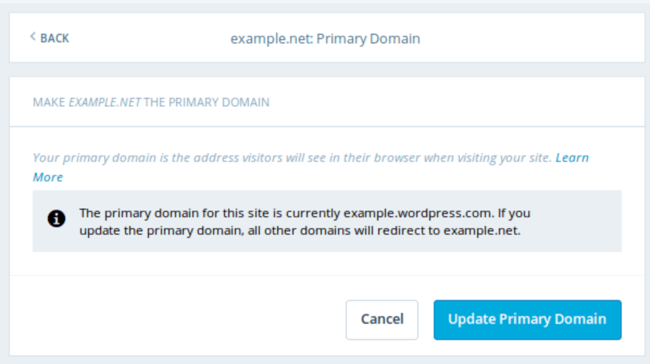
Confirm you meant to make this change by clicking Update Primary Domain.
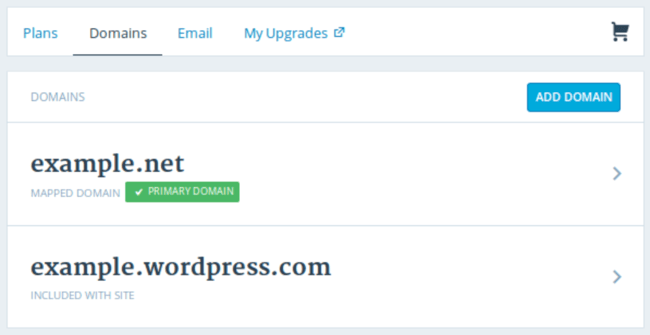
Verify the update was successful by looking for a green box with a checkmark that says Primary Domain.
Now, on to step four: making your website look nice.
4. Choose your theme.
You can customize your WordPress website using WordPress’ many themes and templates, each of which contains a multitude of layouts, formatting styles, colors, fonts, and other visual options.
WordPress automatically applies a default theme that looks rather plain. You can keep it, but your website visitors may not be so impressed. A custom WordPress theme, whether it’s paid or free, will make your website look appealing and professional to your buyer personas.
Similar to the wide range of hosting providers available, there are also hundreds of themes and templates to choose from. To help you out, we’ve put together a guide to 20 of our favorite themes and templates and categorized them by purpose. Whether you’re looking for a theme versatile enough for multiple different business types, or one suitable for your ecommerce site, portfolio, blog, or business, there’s a theme that will work for your specific needs. On top of your theme, you can further customize your pages with a builder tool like Elementor.
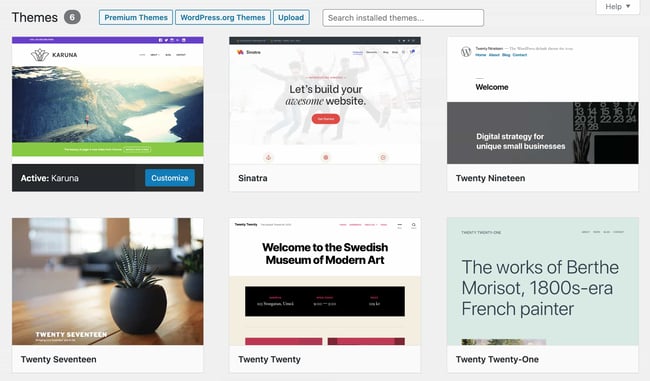
To find a theme that works best for you in WordPress.org, head to your admin dashboard. Click Appearance, then Themes. You'll be brought to another screen where you can browse available themes or search for a specific one you have in mind.
Once you find the perfect theme, simply install it to begin customizing. Each theme has different steps required during the customization process, so be sure to follow them closely. If a theme has a website (often accessible through the WordPress theme and template library), check for documentation as you work through the customization process.
5. Add posts and pages to your website.
When you add content to your WordPress website, it’s usually displayed in the form of posts and pages.
Posts (or “dynamic pages”) are typically used for blogs and portfolios because they automatically place your newest website content at the top of your featured content. Pages are static, which is why they appeal more to business owners — the added content stays in the same place.
Posts and pages are the main post types in WordPress. Additionally, there are other native post types, as well as custom post types. For now, we can just stick to pages and posts.
Start by deciding whether you want a post or page to serve as the homepage (or any page) of your website. To add a post to your website, go to the admin dashboard, click Posts and then Add New.
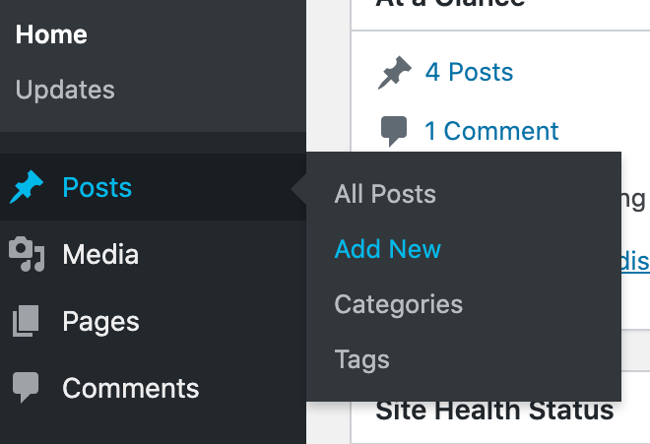
You can add a title for your post, place photos, change the format, and insert page elements via blocks and shortcodes. Click Save Draft to save your changes as a draft, or click Publish to immediately take the post live.
Adding a page to your website is a similar process. In your admin area, click Pages, then Add New.
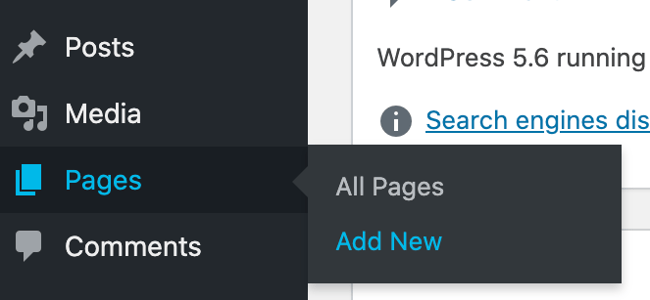
First, add a title to your page. Next, you can insert photos, embed videos, and add content. Follow the same steps to create multiple pages for your website. When finished, click Save Draft or Publish.
6. Customize your website.
Beyond the theme you choose, there are a number of ways to further customize your website. Let's review a few options.
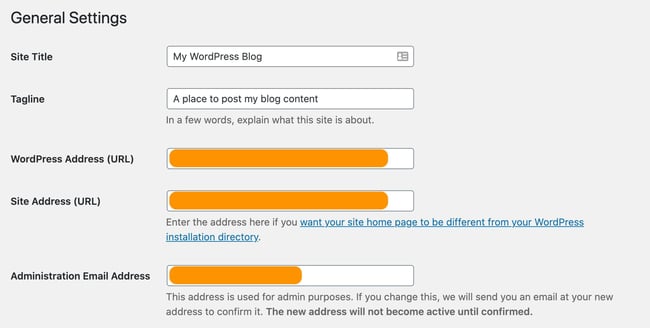
First, let's customize your site title. From your admin dashboard, select Settings > General. Here, add your website title and tagline. You can also toggle other basic site information like you URL, email, time zone, and more.
Next, let's customize your reading sections. Under Settings > Reading, you can change your home page to a static page.

Consider this if you’re a business owner who prefers having content remain in one place on your website. Consider using a dynamic page if you’re a blogger who prefers having your newest content appear at the top of your pages. This way, your visitors can easily find your latest posts.
The navigation bar is customizable, too. This enables your visitors to easily find information on your website.
Add a navigation bar by going to your admin dashboard, clicking Appearance and then Menus.
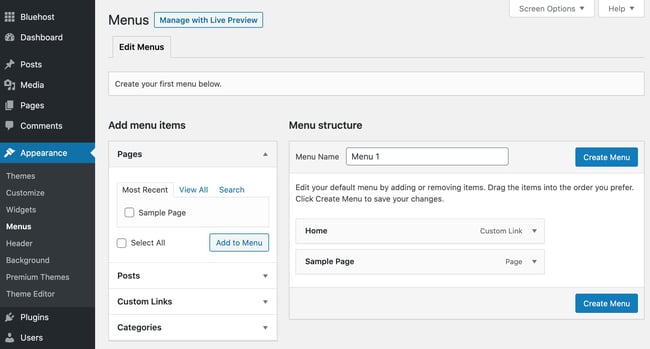
From here, you can determine how you want your bar to look, how many pages you want to include, what you want to title those pages, and what order you want them to be listed in.
Of course, this is just a fraction of what you can do in the dashboard — click here for more information on your WordPress site settings and customization options.
7. Install plugins.
Plugins are pieces of software that add functionality to your WordPress website and enhance the user experience. With over 55,000 available plugins, there are options for most every type of website and user. Some of the most popular plugins available include:
- HubSpot WordPress Plugin: Easily add pop-ups, forms, and live chat to your WordPress website. And as an added bonus, pair this plugin, or other CRM plugins, with your HubSpot CRM.
- The Events Calendar: An effortless events calendar that makes scheduling events from your site easy.
- Yoast SEO: The go-to plugin to help you with on-page SEO. This app makes sure you’re following best practices before you push your site live.
- TablePress: Need a table on your site? Look no further.
- The SEO Framework: Another plugin that can help you master SEO on your site.
To begin installation, head to the Plugins section in your admin dashboard. This shows you all the plugins currently installed on your site. Depending on your host, you might have several plugins installed already. Note that for a plugin to work you must activate it after installing.
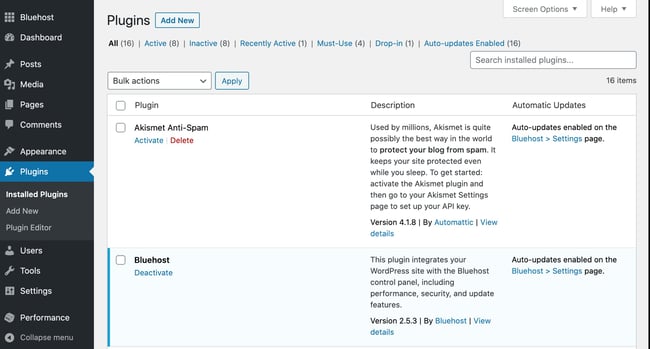
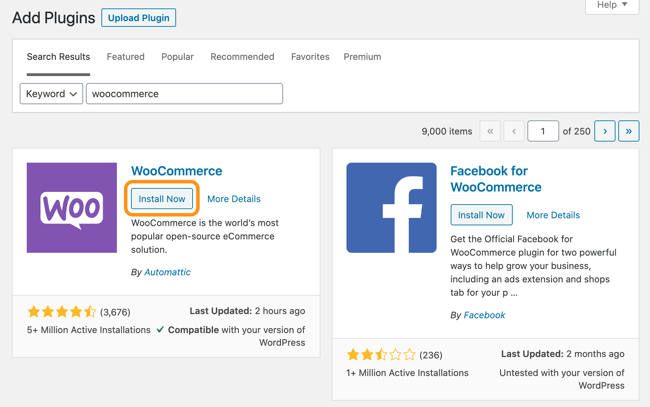
To add a new plugin, click Add New. Search for your desired plugin and then click Install Now, wait a few seconds, then click Activate.
Get the WordPress CRM plugin that helps you organize, track, and nurture your leads.
8. Optimize your website to increase page speed.
Website performance is a critical part of the user experience. If a page takes too long to load, your visitors will move quickly to another site. You don't want to frustrate visitors with slow speeds.
You can improve your website's performance by enabling browser caching. Browser caching is the process of temporarily storing your website's data on your visitors' browsers. That way, your content doesn't need to be sent from the web server for it to appear in the browser, which increases the website speed.
To enable caching for your website, install and activate a caching plugin with the process described above.
9. Get inspired from WordPress website examples.
As you begin to customize your website, you may feel overwhelmed by all the options you have. Instead of starting completely from scratch, it helps to grab some inspiration from other exemplary WordPress websites. Here are some of our favorites:
99% Invisible is a popular podcast that focuses on design and architecture. Their website is sleek, modern, and offers easy navigation for visitors to quickly access each podcast episode.

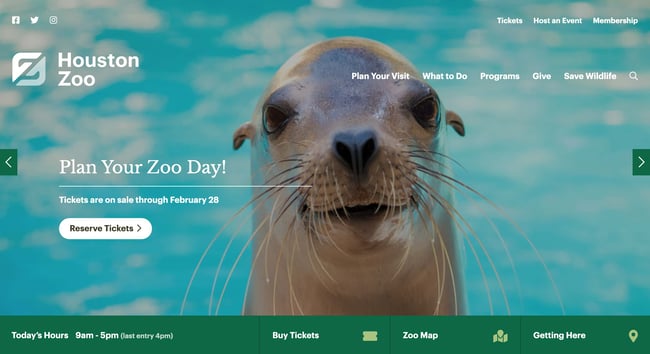
The Houston Zoo's website displays its main attraction on the homepage. The magnifying glass icon on the top menu bar makes searching the site effortless.
Awesome Motive, the creators behind several WordPress projects, engages their visitors with a polished, yet simple website. It features subtle animation to grab people's attention.

WordPress Website Tips and Tricks
There are a number of WordPress tips and tricks to make your website as impactful and user-friendly as possible — we’ve listed 20 of them below to help you do just that.
1. Focus on the basics and create a great user experience with a WordPress theme that complements your business and website content.
2. Use dashes and not underscores when naming your files in WordPress. Google looks as underscores as joiners, meaning your file will look like one big word. That won’t help you with your SEO. Use dashes to make it obvious there are separate words. (For example, use www.example.com/this-is-an-example, not www.example.com/this_is_an_example).
3. Use WordPress’ online support for any questions or concerns you may have while creating or using your website. There are a number of forums and ways to reach out to WordPress experts listed on their website.
4. Use Image Alt Text to your advantage. Image Alt Text can be used to improve your SEO and Google rankings.
5. Keep your sidebar as organized as possible. Stick to the essentials and think about what your website visitors and buyer personas really need quick and easy access to.
6. Back up your website regularly, so if you ever lose access or have technological difficulties, you have everything you need to completely restore your content. There are a number of plugins, such as Snapshot Pro, made specifically for backing up your WordPress content.
7. Learn and understand SEO basics to ensure your website is completely optimized so you can boost your conversions.
8. Create a custom homepage. As mentioned earlier, WordPress will provide you with a default homepage. Take the time to create your own with a theme that works for your business — remember, this is your visitor’s first impression of your business, blog, or portfolio.
9. Keep an eye on your website’s performance and know what is and isn’t working for your visitors. There are a number of useful WordPress plugins, as well as Google Analytics software, to help with this performance.
10. Include an “About Us” page on your website to show your visitors you’re a trustworthy person and/or business. “About Us” pages are known to be the second most-visited pages on websites (after homepages) — so introducing yourself is important.
11. Make sure your site is secure to ensure there are no hackers gaining entry. Again, there are plenty of plugins such as WP Defender to help you with security.
12. Create custom permalinks. Permalinks are the permanent URLs that you plan to keep static for the foreseeable future. They’re important because they improve user experience and enhance your Wordpress website SEO.
13. Create a custom navigation bar (as we reviewed earlier) to make your site easy to use for your visitors.
14. Include excerpts on your blog posts so people don’t land on your blog page and see your entire piece at once. By only including excerpts on your blog page, you make room to list all of your blogs in one location. Visitors can then read the excerpts and click-through to read the posts they are most interested in.
15. Structure your website in a way that makes sense for your business, visitors, and buyer personas. For example, use posts if you’re a blogger and use pages if you’re a business owner.
16. Remove “Comment” and “Share” buttons from specific pages of your website. You don’t need (or want) a “Comment” or “Share” button on your “About Us” page, or any of your service pages for that matter.
17. Consider what your website looks like on mobile. It’s no secret people are searching the Internet while on their phones, tablets, and other mobile devices these days. Consider using a plugin to help you achieve a responsive, mobile WordPress design.
18. Use visuals and video content when possible to break up the text on your website pages.
19. Update your WordPress site and plugins regularly. WordPress will tell you when updates are released. This will keep your website looking fresh and working efficiently.
20. Use social proof to show your new website visitors how many other people have already viewed your site and content. There are plugins to help you do this in a matter of minutes.
21. Pick a CRM that works with your WordPress site. A CRM can help you keep track of the way users are interacting with your website and company. Here's a list of some of the best WordPress CRM options.
Build a Website With WordPress
Having a great website matters. It’s how you connect with your visitors and leads, create a positive first impression with new users, and boost conversions. The good news is creating your own website doesn’t have to be a daunting process…at least not with WordPress.
The easy-to-use CMS offers completely customizable plans suitable for all needs. With no prior knowledge necessary, you can start building your own site for your business, blog, portfolio, or online store immediately.
How to Use WordPress: Ultimate Guide to Building a WordPress Website was originally posted by Local Sign Company Irvine, Ca. https://goo.gl/4NmUQV https://goo.gl/bQ1zHR http://www.pearltrees.com/anaheimsigns
No comments:
Post a Comment