Since its debut in 2016, live streaming video has exploded in popularity. In fact, 82% of people would prefer a live video over reading a social post. It offers the opportunity to forge a more authentic and valuable connection with audiences.
It’s no secret that livestreaming has taken off in a major way. In fact, the total number of hours watched on major streaming platforms grew 99% from 2019 to 2020. Facebook users have eagerly been taking advantage of the popularity of live streaming. Now, one in every five videos on Facebook is live.
![→ Download Now: The Marketer's Guide to Facebook Live [Free Ebook]](https://no-cache.hubspot.com/cta/default/53/50e05b61-09a3-4ce8-8671-e2efbc735218.png)
In this post, we'll walk through:
Facebook Live is a feature of Facebook that lets users livestream directly to the social network platform. Viewers can react, share, and comment during the stream. A recording of the video is also published to the page or profile so it can be watched again later.
Why are marketers getting so excited about Facebook Live? Because it's a fun and fairly simple way for them to use the power of video to communicate their brand stories and build authentic relationships with fans and followers — in real-time.
However, for such a simple concept, Facebook Live has a lot of little nuances that marketers will need to learn if they want to get the most out of the platform. This guide will help you learn the best tricks that can make a big difference in how many people see your live broadcast, how they engage with it, and how it performs.
Facebook Live started as a mobile-only broadcasting feature, but now, Facebook Pages can broadcast from either mobile devices or desktop computers. We'll go over how to broadcast from mobile and desktop devices in the sections below.
How to Use Facebook Live
Facebook Live videos are public, so viewers can watch on any device where they have access to Facebook but don’t need an account. Users can go live on Facebook from a profile, a Page, a group, or an event. Starting a livestream from the app versus a web browser will be a little different, check out the instructions for each below.
How to Go Live on Facebook From the Facebook App
Step 1: Go to the profile, Page, group, or event where you want to go live.
Step 2: Click What’s on your mind? if you’re on a profile and Create a post if you’re on a page. This should open the post options.
Step 3: Click Live video in the post options.
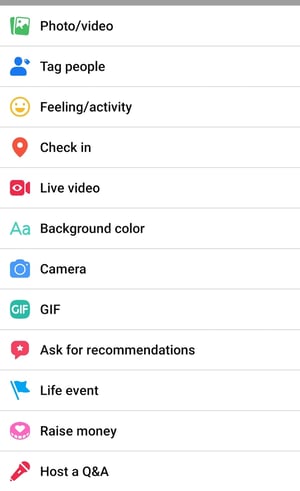
Image Source
Step 4: Tap where it says Tap to add a description to add information about the video.
Step 5: Use the buttons on the bottom to configure the settings and any features or tools you want to use during the stream.
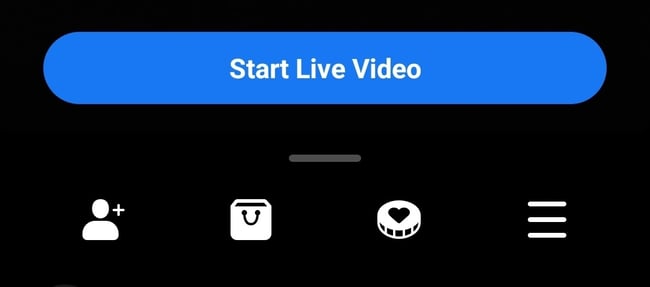
Image Source
Step 6: Tap Start Live Video when you are ready.
How to Go Live on Facebook From a Web Browser
Step 1: On your Facebook homepage, you should see a Live or Live Video option. If you are on a profile, it will be under What’s on your mind? If you are on anything else, it will be under Create Post. The icon will look like one of these below.

Image Source

Image Source
Step 2: Choose to simply Go live or to Create live video event.
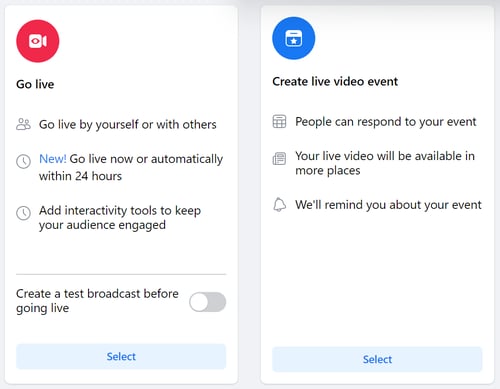
Image Source
Step 3: Then, choose details for your video. These include a start time, a title and description, who to invite as a co-host, and various audio and video controls.
Step 4: Click Go Live in the bottom left corner when you are ready.
Facebook Live Tools
Facebook offers a lot of features for you to further connect with your audience during your broadcast. Utilizing these tools will help boost engagement and create the best possible experience for your viewers. You can mix and match them to serve your stream in the best way for your business.
- Live Polls: You can create a live poll beforehand to share when you go live. Then, you can see your audience’s responses in real-time during the stream.
- Featured Links: Adding one or multiple featured links to the stream to promote your website or other sources.
- Live in Stories: These allow you to share your streams directly to Facebook Stories to reach more of your audience.
- Live Comment Moderation: Manage the conversation that happens in the comments of your livestream. You can limit who is allowed to comment and how frequently with this feature. And, you can even choose a specific viewer to also moderate comments on your behalf.
- Front Row: This feature allows you to highlight your top fans in a special section of your stream. You can give them a special shoutout to show appreciation for them while you’re live.
- Badges: These are a measure of how much your fans are engaging with your content. Fans can earn badges by interacting with your content, whether it's sending “Stars” or tuning in to your Facebook Live videos.
- Donations: Qualified pages in certain locations can add a “Donate” button to their live video. Nonprofits using Facebook’s payment platform don’t have to pay a fee, so they get 100% of the donations.
- Live With: This is a co-broadcasting feature that allows you to host your Facebook Live video with multiple guests.
- Live Shopping: If you have products for sale on Facebook, this feature allows you to add product listings to feature during your livestream.
For more help with going live on Facebook, check out this video! And don’t forget that a recording of the livestream is also published to the platform where you went live. Having that content is great because you can download and repurpose it for further use.
How to Analyze Your Live Video's Performance
How to Access Video Analytics on a Facebook Business Page
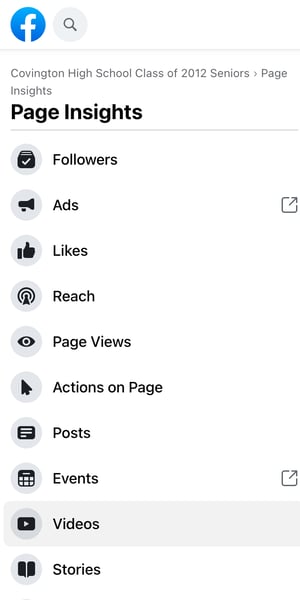
Step 1: To get started analyzing your Facebook Live broadcasts, head to the Insights tab in the left-hand column of your brand's Facebook page: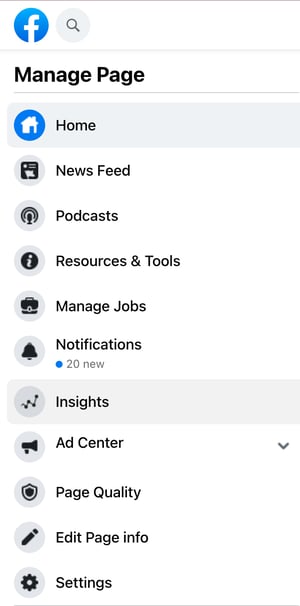
Step 2: Select the Videos section of your analytics.
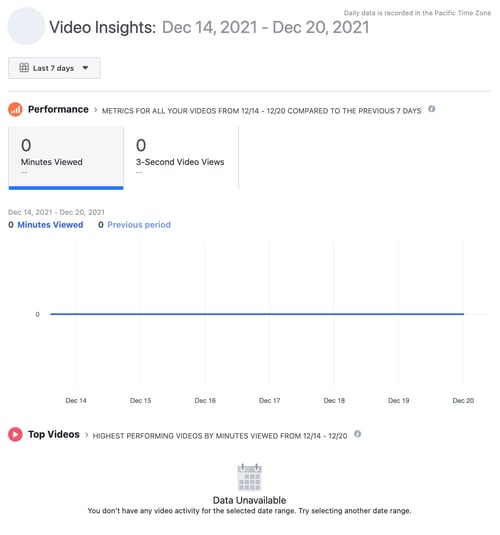
Step 3: From there, scroll down to the Top Videos section and choose a video from that menu to look into. (Note: We didn't have any videos posted to the page we used in this example. If you do have videos, you'll see them appear here.)
Now, let's dive into the nitty-gritty.
The performance analytics available for Facebook Live videos are similar to those of normal videos on Facebook, with some neat additions.
- For Pre-recorded videos: Facebook lets you analyze minutes viewed, unique viewers, video views, 10-second views, average % completion, and a breakdown of reactions, comments, and shares.
- For Facebook Live videos: Facebook lets you analyze all the metrics listed above, plus peak live viewers, total views, average watch time, people reached, and the demographics of who watched your video.

In addition to all of these static numbers, you can click into each metric to see how it changed over time when the video was live. For example, if we click into Peak Live Viewers, we'll see this interactive graph of video viewers over time:

You can even see who your typical viewer was during your broadcast, based on their Facebook profile information:

Now that you've got the steps down, let's get into some tips and tricks.
The last thing you’d want is to start a live video and then be lost. It’s live, so there are no do-overs or chances to start over. So, prepare yourself or your host as much as possible. Outline what the video will entail and follow the rest of the tips below. Also, check out these great examples of Facebook Live videos from various companies.
There are a lot of little things you can do to squeeze the most out of your Facebook Live videos.
1. Brush up on Facebook Live best practices.
Marketers have so much opportunity to reach a wider audience on Facebook Live, so it's worth committing to learning how to run a Live effectively.
In our detailed Marketer's Guide to Facebook Live, we cover essential best practices on how to plan, run, and analyze the results of a business-run Facebook Live. Download the ebook to brush up on these best practices.
2. Test out live video using the "Only me" privacy setting.
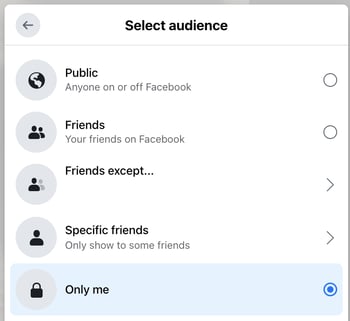
If you want to play around with live broadcasting without actually sharing it with anyone else, you can change the privacy setting so you're the only one who can see it — just like with any other Facebook post.
To switch to Only me, look for the privacy settings. Then, you should see the options and be able to select Only me from this list below.
3. Space out live videos with other Facebook posts.
The art of the organic reach on Facebook has changed over time, but you can still take advantage of it. A big way to accomplish this is to maintain a mixture of regular Facebook posts and Facebook Live videos. The live videos are the major pull, as they tend to garner more engagement. So, spacing them out will maximize the organic reach of all of your posts.
4. Keep reintroducing yourself.
When you first start the video, take a minute to introduce yourself and what the video's about. But keep in mind that when you first start live streaming, you may have zero people watching. Even a few seconds in, you could only have a handful of viewers. As people find your video on their News Feeds, they'll join in — but that means you'll want to reintroduce yourself a second, third, and even a fourth time to catch people up.
5. Make the video visually engaging.
You have to be visually engaging — not just at the very beginning of your broadcast (although that'll be important for when folks view the video later), but throughout the video as more and more people join in.
The more visually engaging you can be, the more you can entice people to stick around. That means keeping the camera moving and not just sitting in one place.
Not only will you get more viewers this way, but you'll also get your broadcast ranked higher in other people's News Feeds. Facebook started monitoring signals of video engagement — like turning on the audio, switching to full-screen mode, or enabling high definition — interpreting that as users enjoying the video. As a result, they've tweaked the algorithm so videos that people engage with in these ways will appear higher up on the feed.
6. Make it spontaneous.
What makes a live video special? The spontaneous, interactive nature of it. People love the ability to interact, and they love the novelty of viewing someone in a live moment when anything could happen. In many ways, it's the new reality TV.
These moments are what make live video special, and they're exactly what differentiates it from scripted, edited, or otherwise pre-recorded videos. Embrace the platform. Banter is always, always good.
7. Don't worry about mistakes or stutters.
Spontaneity works — even if your Facebook Live doesn't go according to plan.
Let's face it, we're all human. And when humans and technology mix, there can sometimes be technical difficulties.
If you're recording a live video, things might go wrong — your equipment could malfunction, you could lose your train of thought, or you could get photobombed by a random passerby. You can't call "cut" if things happen — you have to roll with them and keep filming and talking.
The good news? These things help keep your broadcast human and real. If you wobble your phone while filming, laugh and call it out. If you forget what you were saying, make a joke. The key is to keep the broadcast like a fun conversation, so if mistakes happen, keep it light and keep the lines of communication open with your viewers.
For example, if you make a mistake during your Facebook Live, ask viewers to write in the comments if they've made the same mistake, too.
8. Encourage viewers to Like and share the video.
One of the primary ways Facebook's algorithm ranks a post is by how many people Like and share it. The more people who Like and share your live broadcast, the more it'll show up in people's News Feeds.
But when people are watching a video, they may be more distracted from Liking and sharing it than they would a text or photo post. (That's something the folks at Facebook noticed about video content early on, which is why they began monitoring other video engagement signals as well, like turning on the volume.)
9. Engage with commenters, and mention them by name.
The number of comments on your broadcast is another way to get Facebook to give it a higher relevancy score, making it more likely to show up on people's News Feeds. So encourage your viewers to comment, and engage with people who are commenting by answering their questions and calling them out by name. Not only will it get more people to comment, but it's also a fun way to include your viewers in the live experience, which could make them stick around longer.
Plus, your audience will be thrilled to hear you mention their name and answer their questions when you are live.
10. Have someone else watching and responding to comments from a desktop computer.
When you're the one holding the camera for a Facebook Live video, it's really hard to see the comments popping up on the mobile screen. If the comments are coming in fast, it's especially easy to lose sight of them as they disappear below the fold. Plus, you're probably occupied by recording and entertaining viewers.
Because of this, it's always a good idea to have an additional person logged into the primary account to monitor the comments on a desktop computer. That way, they can take care of responding so the person recording the video can concentrate on creating a great experience.
11. Subtitle your broadcast in the comments section.
Your viewers may be tuning in and out to watch your video during the work day, or they might simply be watching your video without sound. Either way, periodically subtitling the video in the comments section is a great way to keep people engaged. This also allows people who are tuning in late to catch up on what's going on.
12. Ask viewers to subscribe to Facebook Live notifications.
In addition to asking for Likes, shares, and comments, ask viewers to subscribe to live notifications. To do that, all viewers have to do is click the small, downward-facing arrow in the top right-hand corner of the live video post, and choose "Turn On Notifications."
You can also ask them to Like your brand on Facebook, which will make it more likely that they'll be notified of your next live broadcast.
13. Broadcast for at least 10 minutes.
As soon as you begin recording your live video, you'll start slowly but surely showing up in people's News Feeds. The longer you broadcast — especially as Likes, comments, and shares start coming in — the more likely people are to discover your video and share it with their friends.
Because timing is such an important factor for engagement in these live videos, we recommend that you go live for at least 10 minutes, although you can stay live for up to 90 minutes for a given video.
14. Say goodbye before ending your video.
Before you end your live broadcast, be sure to finish with a closing line, like "Thanks for watching" or "I'll be going live again soon."
15. Add a link to the description later.
Once you've finished the live broadcast, you can always go back and edit the description, change the privacy settings, or delete the video, just like you would any other post.
You can add a trackable link to the description in the post, which can direct future viewers to your live video series page, the site of whatever campaign you're using the video to promote, or somewhere else.
We hope this has been a helpful guide. We'll keep you posted with any new developments and tips for connecting with your audience in more cool ways.
Use Facebook Live to Its Full Potential
Social media may have been invented for fun, but it’s grown into an essential business tool. Facebook as a social network is especially valuable for the ways it lets you connect to an audience, and Facebook Live is a great extension of that. Use it to the benefit of your business as a way to promote your product, build brand awareness, or grow your audience.
Editor's note: This post was originally published in May 2020 and has been updated for comprehensiveness.
 How to Use Facebook Live: The Ultimate Guide
 was originally posted by
Local Sign Company Irvine, Ca. https://goo.gl/4NmUQV https://goo.gl/bQ1zHR http://www.pearltrees.com/anaheimsigns

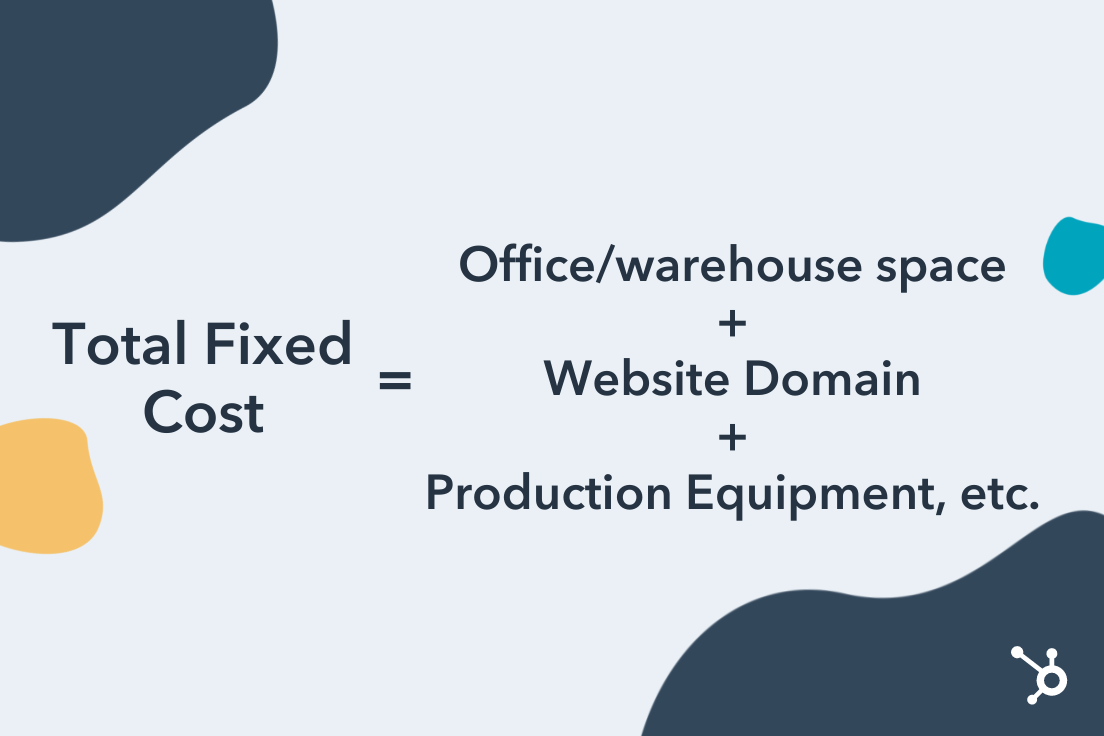
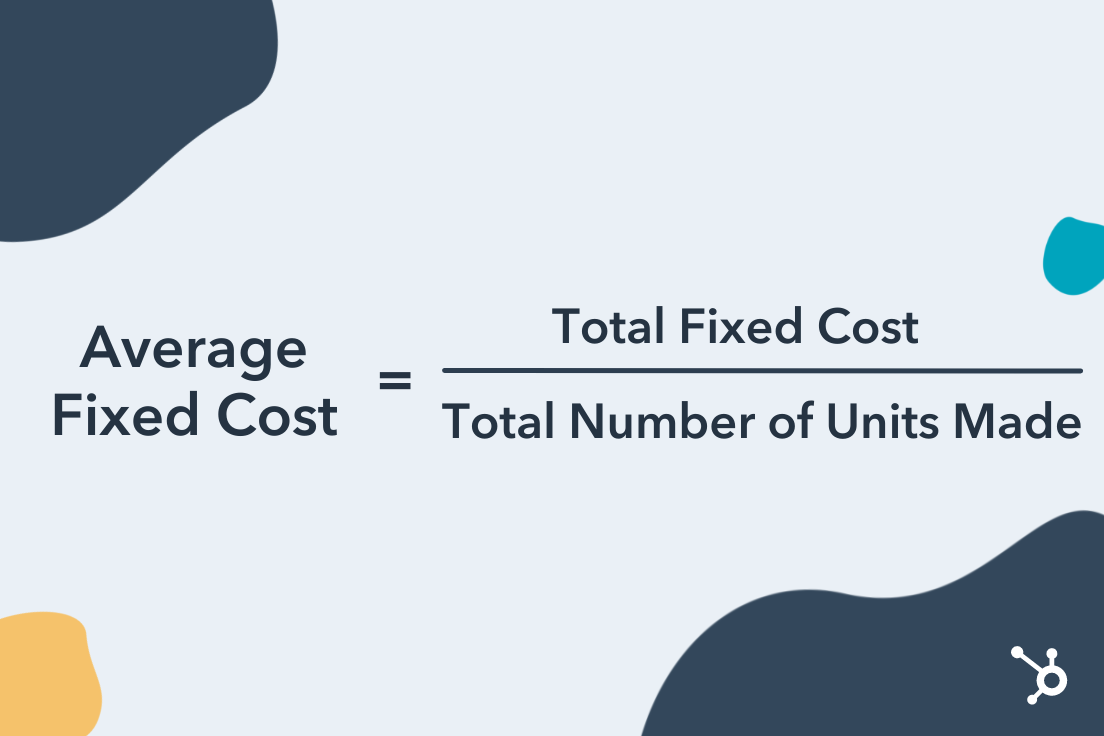 Let's revisit the ecommerce startup example from earlier. Assume this business pays $5,000 per month for the warehouse space needed to manage its inventory and leases two forklifts for $800 a month each. And last month, they developed 50 units of product.


![Download 9 Excel Templates for Marketers [Free Kit]](https://no-cache.hubspot.com/cta/default/53/9ff7a4fe-5293-496c-acca-566bc6e73f42.png)


.png)