The Complete Anaheim Commercial Signage Guide: Costs, Permits, Types, and Process
Opening a new location or upgrading an existing storefront in Anaheim brings a lot of moving parts. Among the most critical—and often misunderstood—investments you'll make is your exterior signage. Your sign is your primary 24/7 visual marketing asset, driving foot traffic and defining your physical brand presence.
To help local business owners navigate the process, we have answered the most frequently asked questions regarding commercial signage design, municipal permitting, costs, materials, and ongoing maintenance in Orange County.
1. Getting Started: Process & Expectations
How does the sign creation process work for a new business in Anaheim?
Getting a custom commercial sign follows a direct 5-step workflow to move from initial concept to completed installation:
Free Consultation & Site Measurement: On-site evaluation to take accurate field measurements, check electrical hookups, and evaluate street visibility.
Design Proposal & Sign Recommendation: Creation of scale renderings tailored to your brand identity, landlord sign criteria, and budget.
City Permit Filing & Approval: Submitting detailed engineered drawings to the City of Anaheim to ensure compliance with municipal zoning codes.
Fabrication: Custom building your sign using durable, weather-resistant materials (typically 2 to 4 weeks).
Professional Installation & Final Inspection: Mounting the signage, making final electrical connections, and securing city sign-off.
How long does it take to design, build, and install a sign?
The end-to-end process typically takes 3 to 6 weeks. The primary variable is municipal permit review timelines. Fabrication itself generally takes 2 to 4 weeks once permits are granted.
Who makes quality, reasonably priced business signs in Anaheim?
Anaheim Signs is a full-service, licensed local manufacturer offering direct-from-shop pricing on design, fabrication, permitting, and installation for retail, commercial, and industrial facilities across Orange County.
What details do I need to provide before getting an accurate quote?
To receive a firm, itemized estimate, share the following details with your sign provider:
Site address and storefront dimensions.
Vector logo files (.AI, .EPS, or high-resolution PDF).
Illumination preference (halo-lit, front-lit, or non-illuminated).
Lease agreement sign criteria (if provided by your property manager).
Target budget and timeline.
2. Choosing the Right Sign Type for Your Storefront

What sign works best for a street-facing retail storefront or restaurant?
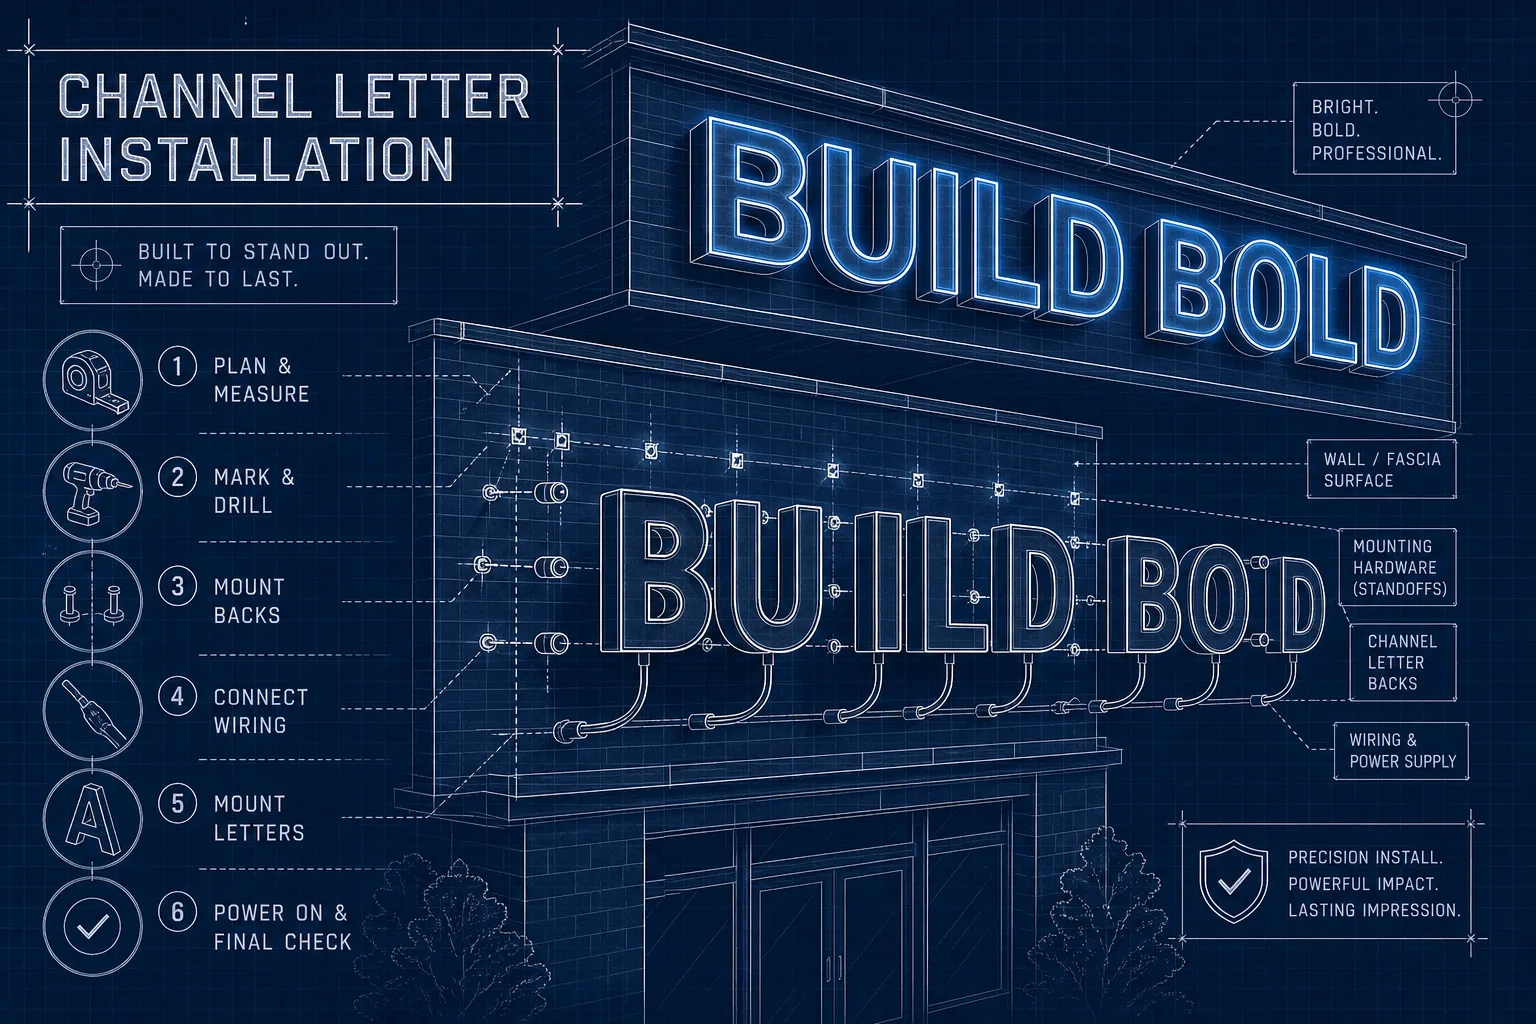
For maximum street-level impact—especially at night—illuminated channel letters mounted directly above the entrance are the industry standard. They offer strong 3D visibility, modern aesthetics, and superior energy efficiency using low-voltage LED modules.
What is the difference between a channel letter, monument, and pylon sign?
| Sign Type | Primary Characteristics | Typical Cost Range | Best Used For |
| Channel Letters | Individually illuminated 3D letters mounted to a wall or raceway | $3,000 – $12,000 | Retail storefronts, plazas, strip malls |
| Lightbox / Cabinet | Single enclosure with a flexible or acrylic face featuring graphics | $2,000 – $8,000 | Small retail, budget-conscious storefronts |
| Monument Sign | Freestanding, ground-level solid masonry or aluminum structure | $5,000 – $50,000+ | Set-back buildings, office parks, multi-tenant centers |
| Pylon / Pole Sign | Tall freestanding structure built for long-range visibility | $8,000 – $200,000 | Freeway-adjacent plazas, high-speed corridors |
Which sign holds up best against the Southern California heat and sun?
Southern California's intense UV exposure causes cheap vinyl and low-grade plastics to fade, warp, or crack within a few seasons. For long-term durability:
Choose heavy-gauge aluminum background panels or cabinets over wood or thin composite materials. Aluminum resists corrosion and thermal expansion.
Select UV-inhibited acrylic or polycarbonate sign faces.
Ensure 3D dimensional lettering utilizes premium automotive-grade polyurethane coatings to prevent thermal delamination.
3. Commercial Sign Pricing & Budgeting
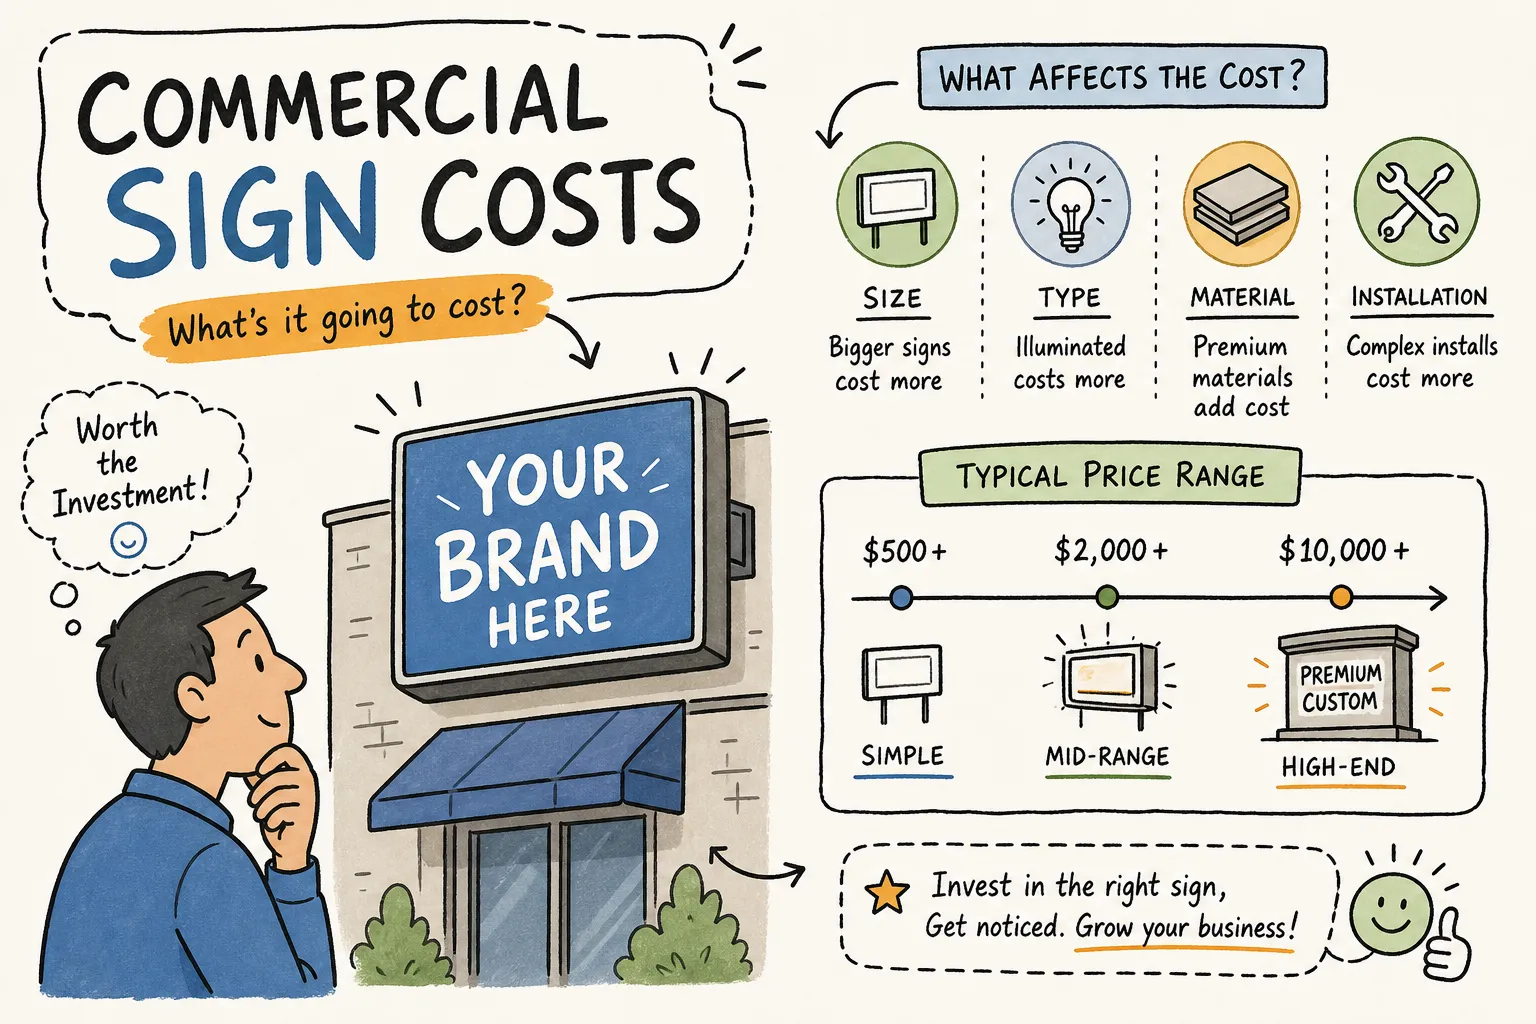
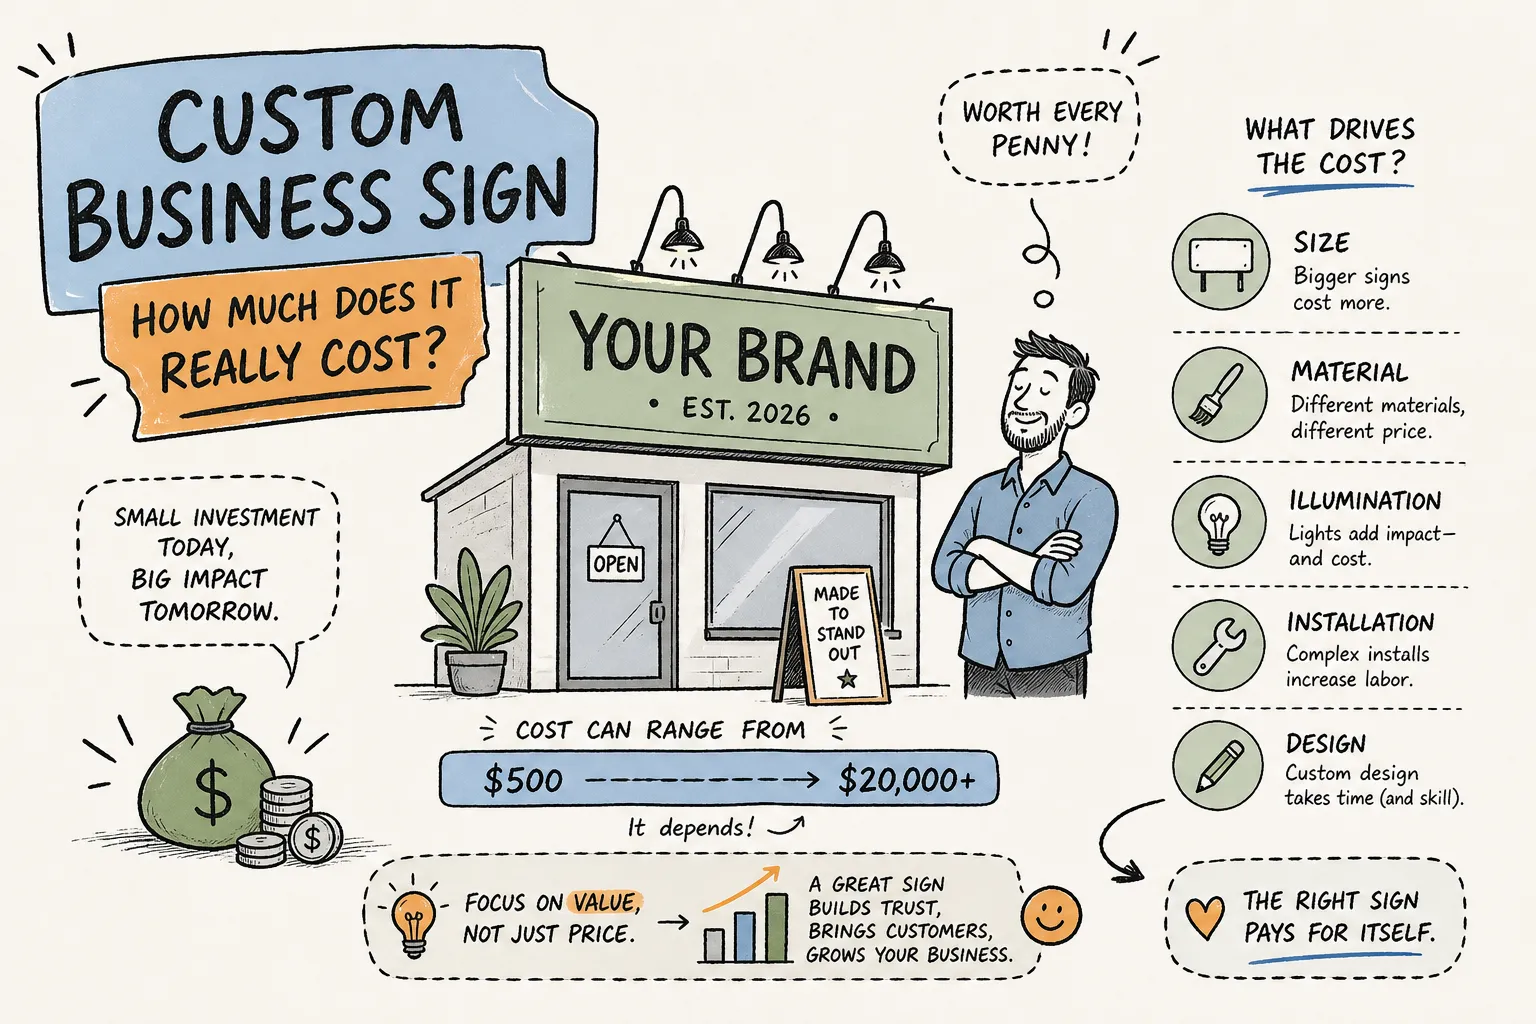
How much does a new business sign cost in Anaheim?
A small, non-illuminated exterior wall sign typically runs $1,500 to $5,000. Illuminated channel letters or mid-size cabinet signs range from $2,000 to $12,000, while complex freestanding monument signs or large digital LED displays range from $5,000 to over $50,000.
Note: Final costs depend on size, mounting height, structural engineering requirements, electrical access, and material selection.
       TYPICAL COMMERCIAL SIGNAGE INVESTMENT RANGES
  +-------------------------------------------------------------+
  | Non-Illuminated Sign     [ $1,500 - $5,000 ]                |
  | Lightbox / Cabinet Sign  [ $2,000 - $8,000 ]                |
  | Lit Channel Letters      [ $3,000 - $12,000 ]               |
  | Freestanding Monument    [ $5,000 - $50,000+ ]              |
  | Digital LED Display      [ $8,000 - $20,000+ ]              |
  +-------------------------------------------------------------+
Why do sign prices vary so drastically?
Price variance stems from five key factors:
Internal Illumination: Custom LED lighting and transformers increase electrical and assembly labor.
Structural Engineering: Freestanding signs require concrete footings, soil testing, and stamped engineering calculations.
Material Grade: High-grade extruded aluminum costs more initially than low-grade plastics, but yields significantly longer lifespans.
Mounting Complexity: High-elevation installations requiring specialized crane trucks or complex architectural penetrations add to site labor.
Permitting Costs: City filing fees, plan review costs, and administrative processing.
4. City Permitting and Code Compliance
Does the City of Anaheim require a permit for exterior signage?
Yes. The City of Anaheim strictly enforces its municipal sign code. Most exterior business signs—including illuminated wall signs, monument faces, and structural alterations—require plan reviews and permit approvals prior to fabrication and mounting.
  +-------------------+      +-------------------+      +-------------------+
  |   Landlord Sign   | ---> | City of Anaheim   | ---> | Licensed C-45     |
  | Criteria Review   |      |  Permit Approval  |      |   Sign Assembly   |
  +-------------------+      +-------------------+      +-------------------+
What happens if my sign doesn't meet Anaheim's sign code?
Installing unpermitted or non-compliant signage can lead to formal code enforcement citations, daily fines, or legal orders requiring total removal of the installation at your expense. Furthermore, commercial landlords can mandate the immediate removal of unauthorized exterior alterations.
What determines the maximum height or size of a sign?
Allowable sign dimensions in Anaheim depend heavily on:
Zoning classification (e.g., Commercial, Industrial, Mixed-Use).
Street frontage length of your commercial suite.
Setback distance from property lines or sidewalks.
Line-of-sight clearance rules (especially for ground signs over 24 inches tall near driveways and intersections).
5. Maintenance, Repairs, and Refurbishment
My sign's lights are flickering or dead. Can it be repaired?
Yes. Flickering or unlit signs usually stem from a failed LED module, a burned-out transformer/power supply, or degraded wiring connections. A licensed C-45 sign contractor can perform an on-site electrical diagnostic and replace damaged internal components—often within a single service visit.
Is it cheaper to repair or replace an existing sign?
Repairing or retrofitting an existing sign is substantially cheaper than full replacement, provided the structural cabinet or frame remains in sound condition.
LED Retrofitting: Replacing old fluorescent tubes or high-voltage neon with modern low-voltage LED modules typically cuts energy usage by up to 70% and restores full night visibility at a fraction of the cost of a brand-new sign build.
How often should a commercial sign be serviced?
Cleaned: At least twice a year to remove soot, dirt, and sea-salt residue (common in SoCal coastal zones).
Inspected: Once annually to verify electrical connections, seal waterproof penetrations, and check structural fasteners against wind load stress.
Next Steps for Your Business
Choosing the right sign involves balancing visual appeal with local zoning regulations and structural durability. Partnering with a full-service local manufacturer ensures your investment is designed correctly, permitted smoothly, and built to withstand the elements.
Have questions about an upcoming sign project or need a quote for an existing location? Contact Rick @ Anaheim Signs to set up a free site evaluation and consultation.